Dual Colored Herring 3
Every year there is a lot of effort put into creating new and innovative color/attractants. At times I think these are more for the fishermen then they are for the fish. That being said, with creativity and innovation comes new and exciting opportunities.
How many options are currently on the market just in flashers alone? Plus we know that more ideas are in dude’s heads right now just waiting to hit the market. Guys who are going to make their mark in the industry with the “Go To”, have to have or absolutely the very best flasher ever created.
The reality is most of them work to some degree. Without question, some of them will outperform the others. Then there are a few which definitely stand out amongst the many, choices.
As fishermen we are always trying to find that upper hand. We will spend money, experiment, have our systems dialed, only to come back next season retooled and excited about the change. I’m not advocating that we discard everything we have done in the past, but perhaps think about fishing one or two rigs with a slight change to see how it matches up to the tried-and-proven.
Bait options are no different. Changes in color and or scent are the norm. Now a day’s, if guys don’t want the hassle of mixing and blending salts, sugars, scents etc. Pautzke’s has made the ability to brine herring almost a no brainer.
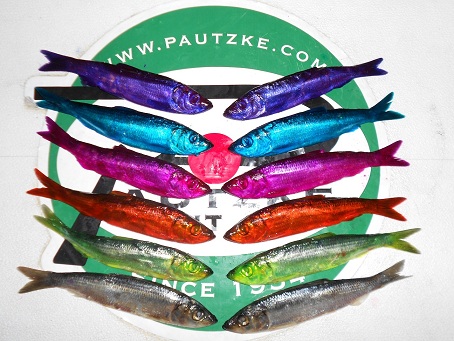
To get a very good quality herring with color, you simply follow a few basic rules. I like to keep my herring in Pautzke’s Fire Brine, at room temperature for 6 to 8 hours. Then I will put them in the bait fridge overnight, for another 8 to 12 hours then they’re done. Now you have great color and firmness which makes for durable baits that will fish very well. By the way, if you were hoping for some UV on your herring, it’s also in the brine, so you won’t need to add any.
Now let’s take it one step further. We’ve already recognized the advantages of multi-colored flashers. How about creating baits that have the ability to flash two colors instead of just one? Weather they are plugged cut, or placed in a helmet, every rotation/ roll gives off dual color attraction.
It’s obvious that if we take herring or anchovies and simply soak one side in Fire Brine, it’s not going to cure the whole herring.
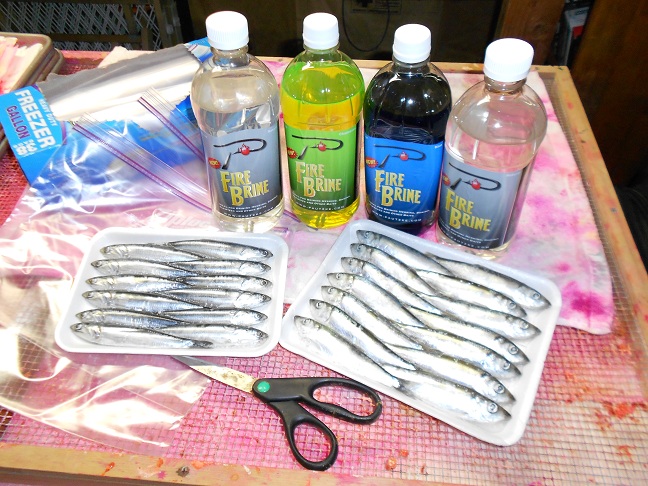
To make sure my herring or anchovies are completely cured, I pre-soak them in the Natural Fire Brine first. This where I also add my Fire Power krill powder or any other scents I may choose. I give them a good eight hour soak time at room or garage temperature. I want to make sure the herring are completely cured before moving on. The first couple hours I will I move the gallon zip lock around gently every fifteen minutes or so, to mix up the brine and krill powder and stir the herring a bit.

Once I have them cured to the firmness that I like, it’s time to add color to one side. Now I do have the option of leaving the herring in the natural brine for up to twenty hours or so. It’s not going to ruin the bait. I always do a minimum of eight and will leave them overnight if I don’t have time for the second step until the next day.
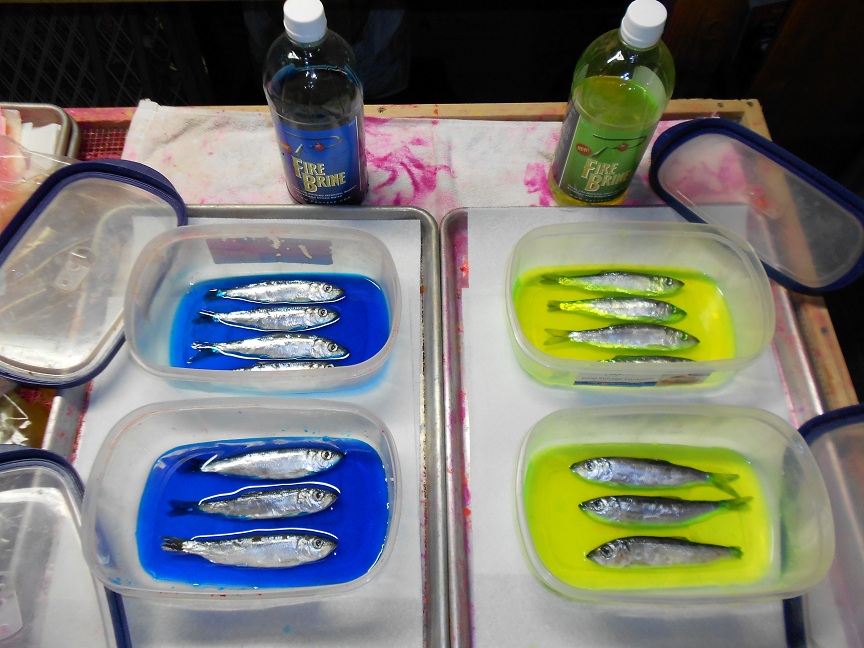
Now for the color; I find it’s easiest to lay the herring or anchovies in a tray first, then slowly pour in just enough colored Fire Brine to just start covering the top of the back or bottom of the tail.
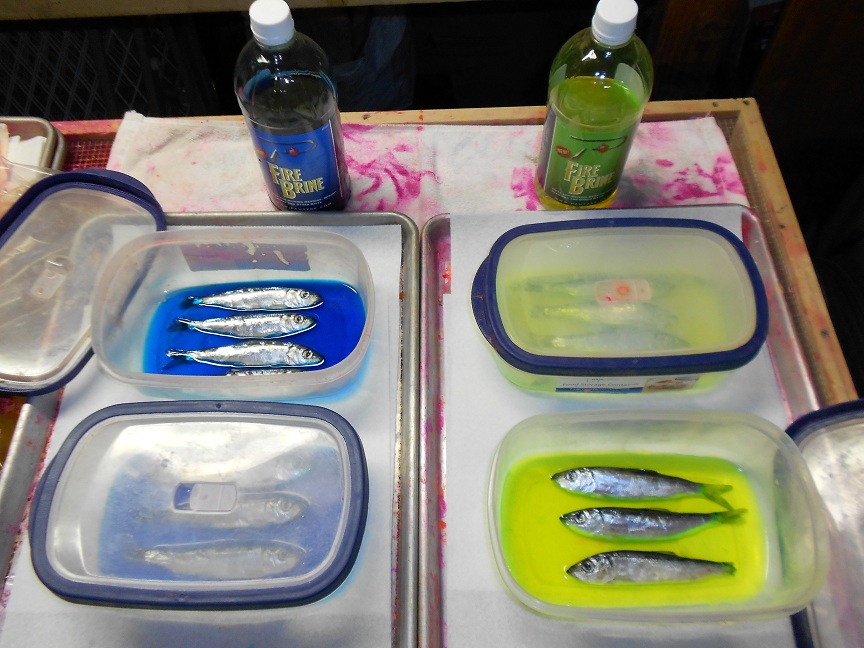
Once I have poured in enough Fire Brine I will then cover the containers with lids. By covering with lids, I ensure that the moister stays in and on top of the exposed skin. If I leave the containers uncovered, the exposed herring may begin to dry on the exposed side.
To make sure I have a really strong color transfer, I will again let the herring soak for another 6 to 8 hours. This allows time for the color to really absorb into that side of the meat.
If I am trying to create bait that has a natural shiner on one side and the other side colored up, I am done. These baits are ready to fish. I will take them out of the brine and place them in a bait container or if I plan to freeze them back on the Styrofoam tray. More on that in a little bit.
Now here is where it gets interesting. Creating baits with color on one side is easy. Now let’s get both sides colored up, with yes; two different colors.
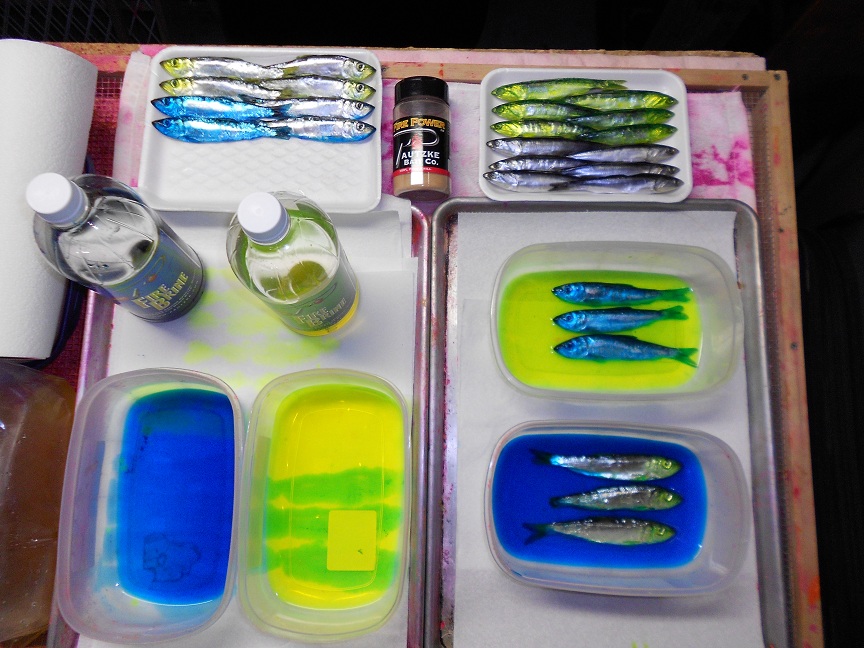
I basically take the baits out of the shallow tray. At this point I have created some herring and anchovies that are all naturally colored, some are natural one side and chartreuse on the other and some are natural one side and blue on the other.
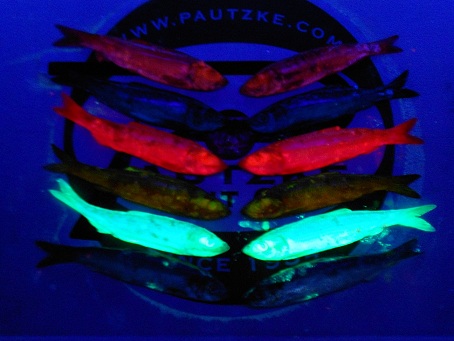
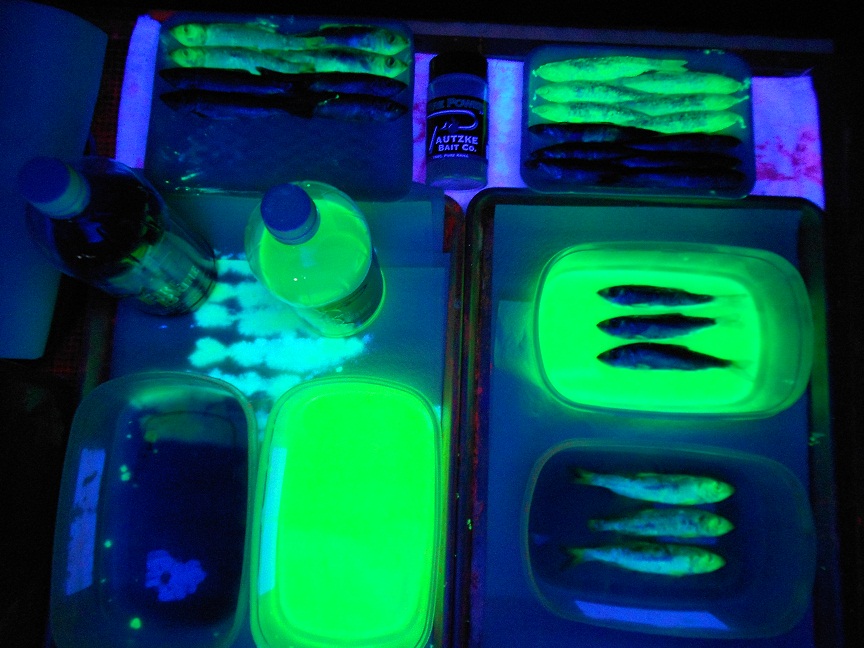
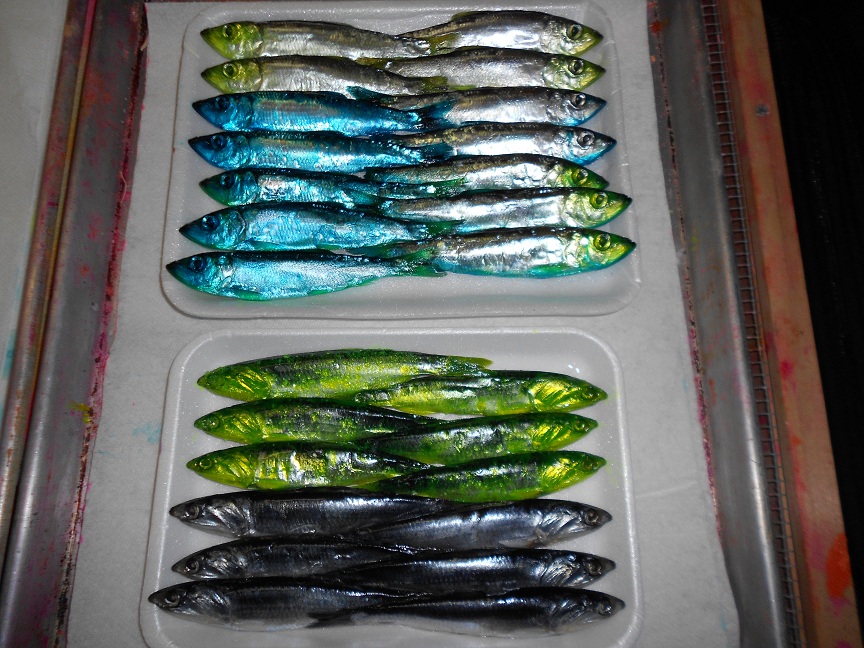
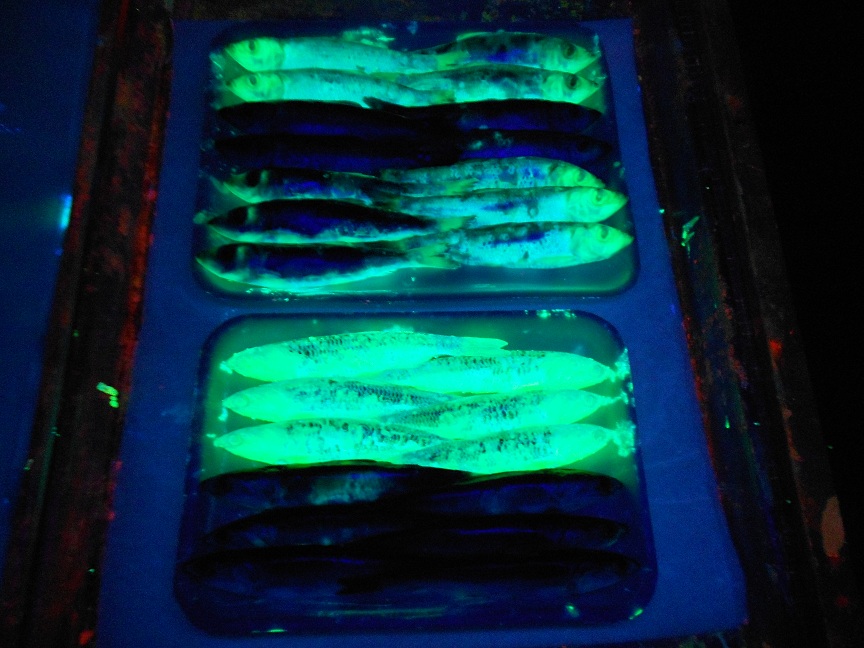
The two photos above now show some of the herring getting a second color on the other side. You can see the photo on top, has a tray with the blue sided herring up and soaking in chartreuse. The tray below that is with the chartreuse side up, soaking in the blue. The photo on the bottom shows all colors under a black light. Notice how dark the blue herring is. It almost appears as dark shadows in the tray of chartreuse while the chartreuse herring glow in a vat of black. “Confused Yet”??
Something else you will notice in this photo. At the very top, I have placed some of the finished herring and anchovies back on the Styrofoam trays. Under normal light you can see which ones are natural, blue or chartreuse. Keep in mind some of these are completely natural and the ones showing color are natural on the other side. Now compare them in the photo on the bottom. These are obviously the same trays however, under black light conditions some of the baits disappear.
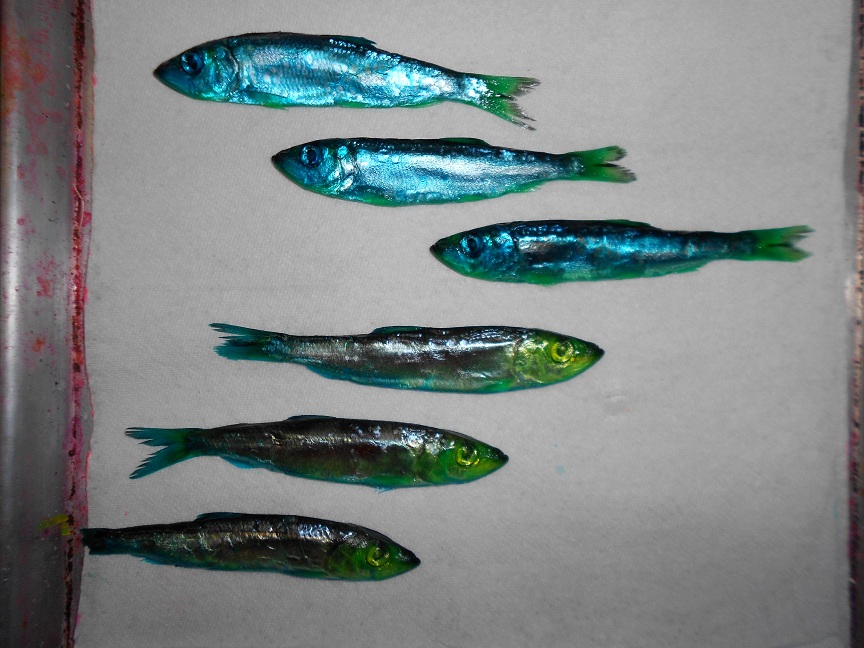
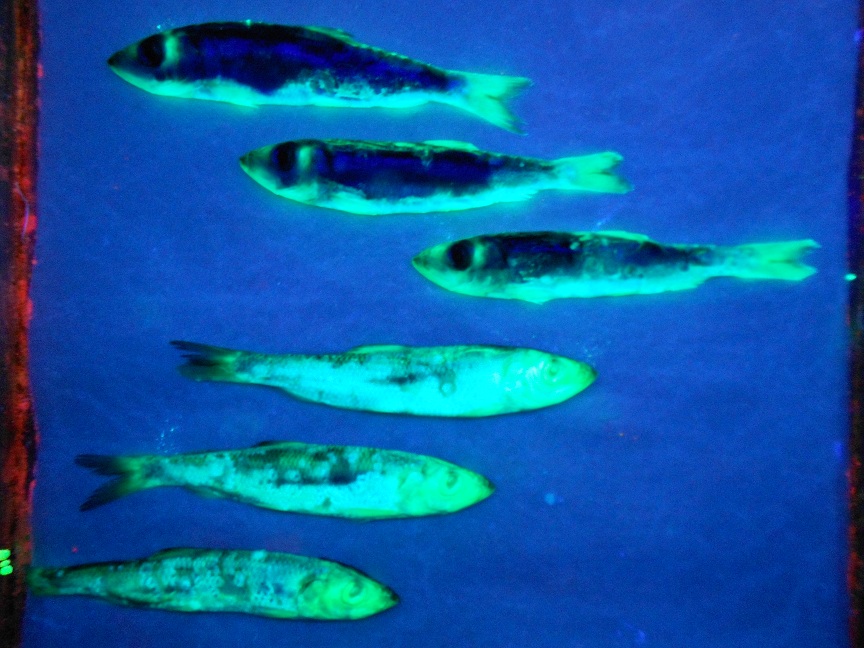
This is another photo to simply show up close two sided herring under normal light conditions and then once again, under a black light. You can imagine that as these baits are fished and rigged properly the roll of the bait will give off a constant state of flash as they transition from dark to light. Again, this can be accomplished with any color combo. I believe a combination of red and chartreuse would be a definite winner. The red and chartreuse flasher has proven its ability time and time again. Also one other point, the red and chartreuse are the strongest UV colors of Fire Brine. Shhhh, Keep that one to yourself and try not to tell anyone.
Here are the finished baits. Some all natural, some natural one side and chartreuse on the other and the labor intensive baits of blue on one side and chartreuse on the other.
These are obviously not baits that you simply cure the night before you intend to fish. You need to plan ahead and give yourself a couple days to complete this bait preparation. It’s that whole 10% who are out there catching 90% of the fish. It comes down to preparation and trying something a little different.
I had mentioned before about freezing. Yes believe it or not, you can refreeze herring. I keep the trays that I purchase them on, just for that reason. I plan to fish these baits in a couple weeks, but wanted to get them done. So now that they are cured, I will place them in the freezer for a day. When they are frozen solid, I will slip them into a vacuum freezer bag and put the vacuum to’em. They will easily last for several months. I usually won’t keep them that long. I will cure up my baits a week or two ahead of time if I need to, freeze them and then plan on fishing them. Usually I cure my herring and anchovies just a few days before I fish them and they always fish very well.
Give dual-color herring or anchovies a try. It just may be the difference for success on any given day.
Duane Inglin
The Outdoor Line
710 ESPN Seattle
www.theoutdoorline.com
Anacortes derby!!! Here we come!! See ya there nelly!!
Great stuff D! I can hardly wait to spin a couple of those in the San Juans this weekend and down on the Columbia the week after! I'm really fired up about the anchovies: If you've eliminated or even reduced "belly blow" on those critters you may be up for a Nobel Prize!
Looking forward to "Gifting" my guide next weekend with "Ty-Dyed" herring. Thanks for the tip. I caught it on this mornings radio program while driving to Wenatchee to pickup my re-built Winchester 101 from John Krause, Gunsmith at High Mountain. Jim